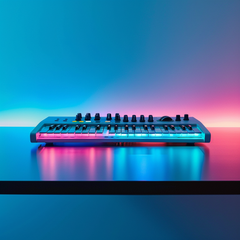
Effortlessly Connect Your MIDI Keyboard to Any DAW: Step-by-Step Guide for Beginners
Are you a budding music producer eager to unlock the full potential of your MIDI keyboard? Look no further! In this comprehensive guide, we'll walk you through the seamless process of connecting your MIDI keyboard to your Digital Audio Workstation (DAW) - no matter which one you're using. Get ready to elevate your music-making experience and unleash your creative genius.
Understanding MIDI Connectivity
MIDI, or Musical Instrument Digital Interface, is the language that allows your electronic music equipment to communicate with each other. When you connect your MIDI keyboard to your DAW, you're essentially bridging the gap between your physical instrument and the digital realm of music production.
This connection enables you to record, edit, and manipulate your keyboard performances directly within your DAW, opening up a world of endless possibilities. Whether you're composing intricate melodies, layering harmonies, or programming complex rhythms, a seamless MIDI integration is the key to unlocking your full creative potential.
Choosing the Right MIDI Keyboard
Before we dive into the setup process, it's important to ensure you have the right MIDI keyboard for your needs. When selecting a MIDI keyboard, consider factors such as the number of keys, the presence of additional controls (like knobs, sliders, or pads), and the overall build quality.
For beginners, a compact 25-key or 49-key MIDI keyboard is often a great starting point, as it provides a comfortable playing experience without overwhelming you with too many features. As you progress in your music production journey, you can always upgrade to a larger, more feature-rich MIDI keyboard.
Connecting Your MIDI Keyboard to Your DAW
Now, let's get to the heart of the matter - connecting your MIDI keyboard to your DAW. The process is surprisingly straightforward, and with a few simple steps, you'll be up and running in no time.
Step 1: Identify Your MIDI Keyboard's Connections
Examine your MIDI keyboard and locate the MIDI ports. Typically, you'll find a MIDI In and a MIDI Out port. These ports are where you'll connect the cables to establish the communication between your keyboard and your DAW.
Step 2: Connect the MIDI Cables
Using MIDI cables, connect the MIDI Out port on your keyboard to the MIDI In port on your computer or audio interface. If your computer or interface doesn't have a MIDI In port, you may need to use a MIDI-to-USB adapter.
Step 3: Configure Your DAW
Within your DAW, navigate to the MIDI settings and look for the option to select your MIDI keyboard as the input device. This will allow your DAW to recognize and respond to the MIDI data being sent from your keyboard.
Depending on your DAW, the specific steps may vary, but the general process is similar across most platforms. Consult your DAW's documentation or online tutorials for detailed instructions tailored to your software.
1. Ableton Live
- Connect your MIDI keyboard via USB to your computer.
- Open Ableton Live and go to Preferences (click "Options" > "Preferences" or press Ctrl + ,).
- In the Link/Tempo/MIDI tab, find your MIDI device under Input and Output.
- Enable Track and Remote for your MIDI device to send MIDI notes and control functions.
- Close Preferences, and your keyboard should now work in Ableton Live.
2. Logic Pro
- Connect your MIDI keyboard to your computer.
- Open Logic Pro; it should auto-detect your MIDI keyboard.
- If it doesn’t, go to Logic Pro > Preferences > MIDI and ensure MIDI Input is enabled.
- To test it, add a software instrument track and play on your keyboard—Logic should now receive MIDI data.
3. FL Studio
- Connect your MIDI keyboard to your computer.
- Open FL Studio, then go to Options > MIDI Settings.
- Under Input, find your MIDI device and select it.
- Ensure Enable is checked. You can also set it as the Controller Type if needed.
- Close settings, and your MIDI keyboard should be active and ready in FL Studio.
4. Cubase
- Connect your MIDI keyboard via USB to your computer.
- Open Cubase, then go to Studio > Studio Setup.
- In the MIDI Port Setup section, ensure your MIDI device is listed and enabled.
- Close Studio Setup, then create a new MIDI or instrument track and set your keyboard as the input device.
- Play your keyboard—it should now send MIDI data to Cubase.
Step 4: Test the Connection
Once you've made the necessary connections and configured your DAW, it's time to test the setup. Start by playing a few notes on your MIDI keyboard and observe if the corresponding MIDI data is being registered in your DAW. You should see the MIDI notes being recorded or triggering the appropriate sounds.
If you encounter any issues, double-check your connections, ensure your MIDI keyboard is powered on, and verify that your DAW is properly configured to receive MIDI input from the correct device.
Unlocking the Potential of Your MIDI Keyboard
With your MIDI keyboard seamlessly integrated into your DAW, the possibilities are endless. Explore the various MIDI-related features and functionalities within your DAW, such as:
- Recording MIDI performances for later editing and manipulation
- Utilizing MIDI-based virtual instruments and sound libraries
- Automating MIDI-controlled parameters for dynamic performances
- Experimenting with MIDI-triggered effects and processing
- Layering and stacking MIDI tracks for lush, complex arrangements
Remember, the key to unlocking the full potential of your MIDI keyboard lies in your willingness to experiment, explore, and embrace the creative freedom it provides.
Conclusion
Connecting your MIDI keyboard to your DAW is a game-changer for any aspiring music producer. By following the steps outlined in this guide, you'll be able to seamlessly integrate your physical instrument with the digital realm of music production, unleashing a world of creative possibilities.
Embrace the power of MIDI, and let your music-making journey soar to new heights. Happy producing!


